How To: Cover a Birthmark with Airbrush Makeup
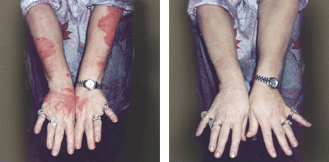
Want to know an easy way to cover up your birthmark that actually works? Well, read on! Airbrush makeup is the perfect tool for covering affected areas. Basically, the bigger the birthmark, the more likely I would be to recommend airbrush makeup. For small birthmarks it’s probably not worth buying an airbrush makeup kit unless you are going to use it for your main makeup system, but definitely look into this as an effective way to cover large birthmarks on any part of your body.
Professional makeup artists also use airbrush makeup to cover tattoos before magazine shoots and it’s always used in Hollywood to cover unwanted scars, tattoos or skin blemishes on actors in the movies. Airbrushed makeup will dry almost instantly upon contact with your skin and will stay on for the whole day without smudging or smearing. You’ll feel comfortable with this out in the open or under your clothes.
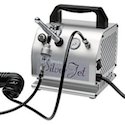
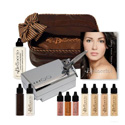
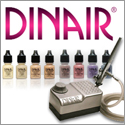
The best consumer airbrush makeup brand for covering birthmarks is by far Dinair. Their range of paramedical makeup skin tones covers pretty much all skin types and, since their kit is so compact, easy to use and complete, the $199 is well worth the investment even as a single use tool for covering birthmarks. It only takes a few passes of airbrush makeup to neutralise the skin discoloration and, with the right makeup tones and correct technique, you can create an extremely natural look over your birthmark.
Remember that when using airbrush makeup, only makeup and air touches the skin, so, if you have any sensitive areas, you will are not aggravating it by rubbing a brush or sponge over your skin. If you do find that makeup tends to cause a skin reaction for you, look for those brands which offer water-based makeup rather than silicone.
To cover a birthmark with airbrush makeup follow the steps below:
- Ensure the area is free from hair so you may have to shave, pluck or wax a few hours earlier. Though this step is not essential, it will result in a better effect as makeup may catch in body hair (depending on how thick it is).
- Clean the area (with a natural cleanser or, if your skin is not sensitive, you can use alcohol)
- Start with a concealer that matches your skin tone. You will need to work out the right number of drops depending on the size of the area you are working with. Start with 3 to 5 drops.
- With the airbrush makeup gun use a continuous, even motion and build coverage by spraying light passes around the area. You want to be between 6-12 inches away.
- Now, using the paramedical skin tones makeup, build layers of makeup until you have matched the right color. Remember, watch the color, not the makeup. The makeup will layer gradually and seamlessly: you are using your own eye as a guide.
- At this point the color tones should match seamlessly and naturally. However, it will look ‘too perfect’ and you must trick they eye by adding imperfections. Do this with a spot stencil. Add 2-3 drops of darker makeup and simply airbrush over the stencil from about 6 inches away.

 An article by


